Thursday, October 25, 2012

BOLT ACTION AND NAPOLEONIC REINFORCEMENTS

I did not get to the SESWC last week as we were down in London visiting our daughter who has moved into a flat in Wimbledon. Having driven home yesterday I have now gone down with a bad cold and wont get to a game tonight either.

So this week I have added a review of the Bolt Action WWII rules from Warlord/Osprey as a page on the blog. This is a draft which I wrote for the review section of Angus Konstam’s Edinburgh Wargames page.

Once I can face the cold of my garage I will be working on retouching and rebasing 3 more regiments of Napoleonic cavalry which I have bought painted from South Africa on ebay. These will complete my 1812-14 French and Russian light cavalry commands.
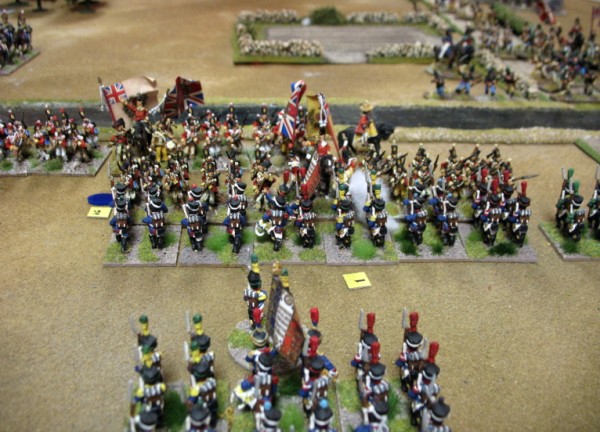
Here is an update on some previously finished staff figures which I will use with my Napoleonic British army. I bought these nicely painted figures on ebay mounted on single bases and I have now rebased them in pairs as command vignettes. The 3mm thick MDF bases are from Warbases and the Silflor tufts were supplied by Mutineer Miniatures.


Wellington and staff

Lord Uxbridge and dragoon guard on foot
 
Stapleton-Cotton and ADC


Friday, October 12, 2012

HAIL CAESAR: The Crossings of Jordan

This week we had arranged our Hail Caesar Biblical game - Assyrians versus allied Israelites and Egyptians.  Donald Adamson came up with the scenario, orders of battle and umpired whilst  Hugh Wilson  provided the venue and terrain.  Suzanne Wilson provided the pre-game refreshments.


Assyrian army get to the Jordan...but does not cross
We used figures from various collections-  Dave provided the Assyrians, Donald the Israelites, Olivier and Hugh the Egyptians.  The figures were all based on Impetus bases or else were put onto Impetus sized sabot bases.  As in our last game we decided that a 12cm wide Impetus base was a standard sized Hail Caesar unit. 

Martin Gibson and Bart Zynda commanded the Israelites, Oliver, Hugh, Colin Jack and Kevan Gunn commanded the Egyptians whilst Dave O’Brien, Campbell Hardie and myself commanded the Assyrians.
How the game Played

Realising that we could not get much of the Assyrian army across the Jordan before the pursuing Israelites and Egyptians caught up with the rear of our widely spread out army we decided to turn and crush our pursuers.


My cavalry form up.. Ark of Covenant in cart in background
We formed with the infantry division commanded by Campbell in the centre, Dave took the heavy chariots and deployed them on our left and I commanded the cavalry on the right flank.  The allies massed the Israelites on their right flank with the Egyptians covering the centre and left.  Campbell did not have time to get his whole command deployed into a single group before it was engaged by the pursuing Egyptians.  Campbell managed to hold of the Egyptians and charged the my cavalry into their chariots.  I drove them back but I then blundered and 3 of my units fled to the rear facing away from the enemy.  The Egyptians pursued with their best remaining chariot unit but my disordered cavalry who had not fled defeated them in melee so saving their more craven comrades.

On our left flank Daves heavy chariots rumbled into the Israelites driving back their front line of infantry and pushing back the troops deployed behind them.  Another move of melees drove the back rank of the Israelites of the table.  At that point ended.  We had broken 2 of the enemy divisions but had not won enough of a victory -  to recover from not getting the Ark of the Covenant of the table.

Egyptians attack infantry division.....
General Briefing
As the Assyrian Empire extends, in the west it begins to rub against the Egyptians, and in particular, their satellite nation: Israel.
The King of Assyria, Da Obron, leads a surprise attack into Israel, and pillages Jerusalem. He retires towards Nineveh with his spoils, including a wooden chest, which may contain the Ark of the Covenant.
Just west of the River Jordan, the Assyrian rearguard spies two clouds of dust emerging from the west. In quick order one resolves itself into the Egyptians led by the famous General of the Pharoahs, Olle Re  The other appears to be led by the Chief Priest of the Temple of Solomon, Colleviticus.
The Assyrians begin the game in a double width column along the road, with its head having just reached the ford. The ford is two units wide.
The game is won by the Assyrians if they can get the wagon train with the Ark of the Covenant off the east end of the table.
There are decisions to be taken.  Players refer to individual briefings on the night.

Infantry division commander inspires his troops......

Assyrian Briefing and OB
You begin the game in a column on the road to the ford. The head of your column has reached the ford, which can be crossed at half pace. It is only one unit wide.
You have a report from a spy that the Egyptians have a force east of the River Jordan. Where it is, or the size of it, is uncertain.

Assyrian Army: 3 divisions
DIV 1  5 Heavy Chariots. Division breaks on loss of 3 chariots
DIV 2  5 Units of Cavalry. Division breaks on loss of 3 units
DIV 3  4 units of spear and bow armed infantry; 2 units of bow and sling armed infantry; 2 units of spear and bow armed light infantry; 1 unit of Elamites; 3 units of bow armed skirmishers; 1 unit of javelin armed skirmishers. Division breaks on the loss of 5 non skirmish units.
Did I also mention that you can also win by routing both the enemy forces (Egyptians and Israelites fight as separate armies), as well as getting the Ark of the Covenant off the board?

Egyptian/Israelite Briefing and OB
The Israelite player gets to roll a dice every turn. On a six, the Ark of the Covenant explodes onto light (you have seen the films) and kills all the Assyrian drivers of the wagon train. The wagon train can only be re-crewed by a unit touching the wagon train, and moving off again next move.
If adjacent to the River Jordan at any point, The Israelite can pray for a crossing, which succeeds on a 6, then a 5 or 6 in the second turn and so on, getting progressively easier. Only Israelite forces can use this crossing. It is one unit wide, and crossed at half pace.
The subsidiary Egyptian force can appear anywhere east of the River Jordan, on the northern edge of the board, but not closer than 30 inches from an Assyrian unit, and only after the Wagon Train is 24 inches east of the ford on the road.

Egyptian Main Force: 3 divisions
DIV 1  4 Chariots; 4 chariot runners. Break on 3 or more losses of chariots
DIV 2  2 Egyptian spearmen; 1 Kushite; 3 bow armed skirmishers. Break on loss of 2 or more non skirmishers
DIV 3  2 Egyptian Axemen; 1 Sherden Guard; 3 bow armed skirmishers. Break on loss of two or more non skirmishers
Israelites: 3 Divisions
DIV 1  4 chariots; 4 chariot cavalry out-riders. Break on 3 or more chariots lost.
DIV 2  3 Judean spearmen; 2 bow armed skirmishers; 1 javelin armed skirmishers. Break on loss of 2 or more non skirmishers.
DIV 3 3 Judean spearmen; 2 javelin armed skirmish infantry ; 1 bow armed skirmish unit. Break on 2 or more non skirmishers
Egyptian flank force
DIV 4  2 chariots; 6 Egyptian spearmen. Beak on the loss of 5 units

Monday, October 8, 2012

NAP: 2nd Salamanca or The River Tormes 12 November 1812

I was away this weekend at the Manor House hotel at Lundin Links  in Fife for a large scale 28mm Napoleonic game. It was played by 10 gamers from AB1 group, largely members of the SESWC,  over 2 days and was a hypothetical battle set during Wellington’s retreat from Burgos and Madrid in November 1812.   The rules used were Black Powder with the revised  turn sequence. It was great fun with masses of troops.

We fielded 132 infantry battalions, 36 cavalry regiments and 50 guns - an approximate total of 4,000 figures.  The table was 27ft long by 6ft wide.

Clausel launches the Chasseur Brigade towards Calvariza....
My original idea was to refight Salamanca but as we had missed the 200th anniversary I came up with this hypothetical scenario set near Salamanca in November 1812.  It is a what might have been battle.  It assumes that the combined French armies facing Wellington army decided to adopt the aggressive plan of Marshal Jourdan rather than the  historic distant flanking movement of Marshal Soult which forced Wellington to retreat to Cuidad Rodrigo without accepting battle.

Right flank - British still hold Cristoval and threaten to recover the ford
I will add a separate page to the blog with all the background, player briefings, OB, deployment limits and map of the table game. 

More photos and descriptions at
http://www.flickr.com/photos/bill26048/sets/72157631714986602/

Here is the real historical background.
Following the victory at Salamanca on 22 July 1812 Wellington went on to liberate Madrid and then leaving Hill with half of the allied army to hold Madrid and Toledo turned his attention to the siege of Burgos. 
Lacking sufficient heavy artillery and the skilful defence of the castle by Dubreton this proved beyond the powers of his army.  Threatened by a reorganised and reinforced Army of Portugal under Souham Wellington raised the siege of Burgos on 21 October. He quietly slipped away, undetected by the French until late on 22 October. The drawn Battle of Venta del Pozo was fought on the 23rd. Between 25 and 29 October, Souham and Wellington fought a series of actions along the Pisuerga and Carrión Rivers at Palencia, Villamuriel de Cerrato, and Tordesillas which are collectively called the Battle of Tordesillas. When the French seized the bridge over the Duero River at Tordesillas on the 29th, Wellington was compelled to order a further retreat.
On 29 October, Hill received Wellington's positive order to abandon Madrid in the face of the advance of the combined forces of Soult and King Joseph from Valencia and march to join him.  After a clash with Soult's advance guard at Perales de Tajuña on the 30th, Hill broke contact and withdrew in the direction of Alba de Tormes. Joseph re-entered his capital on 2 November. Anxious to destroy the British, Joseph and Soult rushed after them without bothering to leave a large garrison in Madrid.
The Allied retreats continued until Wellington and Hill joined forces on 8 November near Alba de Tormes south east of Salamanca.  By 11 November, the combined French armies faced Wellington's Allied army near the old Salamanca battlefield.   This is the starting point of this game.

View of French centre and right - Spanish about to attack near windmill
General Briefing
The Anglo/Portuguese/Spanish army is deployed in a line with the right at Alba de Tormes on the river Tormes, the centre on the low ridge at Calvariza Ariba with the left separated by the Tormes from the centre at  San Christoval.   Note that Alba de Tormes itself is of the table to the south.    The combined French armies are deployed on the east bank of the Tormes and to the east of San Cristoval north of the line of the Tormes
The River Tormes runs north behind the east edge of the table before veering west across the table towards Salamanca which is of table to the west.  The Tormes is fordable at many points above Salamanca towards Alba especially on its northern run between Huerta and Villa Gonzalo.

View from French left - Jourdans attack well underway - despondent Brits in background
The Setup
The British players from south to north were Chris Henry (Clinton), Angus Konstam (Ned Packenham), John Glass (D’Espana), John Perkin (Wellington and Leith) and Chris Stone (Lowry Cole).   The French players from south to north were Ken Pearce (Jourdan), Dave Imrie (Clausel), myself (Soult) and Jack Glanville (D’Erlon).  Donald Adamson (King Joseph) based his headquarters in the fine buildings of the convent of Huerta beside my command.

The British had 12 brigades deployed on the table at the beginning of the game split equally across its 3 quarters.  They had a further 6 brigades in local reserve with a distant reserve of 2 more brigades under Wellington’s direct command. 

The French had 20 Brigades in their initial strike force with 6 on each flank and 4 in each of the centre commands.  Some of these brigades began on table and the others could be attempted to be ordered on one per turn per table quarter.  The French had a further 7 brigades in  a general reserve with 2 allocated behind each flank and 3 to the centre.  The French plan was a double envelopment with their massed forces on the flanks with the centre acting defensively except Clausel who also had to support Jourdans attack in the south.

Spanish develop attack in centre.  King Josephs guard hold firm....
The River Tormes where it dissected the table was only crossable at the ford south of  Cristoval.  However event cards allowed other fords to become usable when the river ran low.  The hills were good going, blocked line of sight and allowed overhead fire by artillery.  The woods could be crossed by formed troops at half speed.  The villages were each represented by a single Black Powder built up area, while the windmill and watermill that appear in many of the photographs were just for scenic effect.

How the game played
As planned the French launched their attacks on each flank.  Only in the centre right (my command) was the build-up of the strike force effected by poor command rolls .

Vistula legion veterans lead Derlons advance....
On their right flank in the north beyond the bend of the River Tormes under D’erlon the French made good progress - their overwhelming numbers fairly rapidly destroyed a British infantry brigade.   The British commander retired 2  battalions south of the ford to hold the river line whilst leaving a reaguard of a battalion and a gun in Cristoval.  A gallant cavalry action between the British light dragoons and the Polish lancers lasted many turns on the far flank until finally both the British regiments broke and fled.  The Lancers played little further part in the action as both regiments were shaken and their brigadier repeatedly failed to rally them.  The French brought up 6 battalions to attack Cristoval but due to poor coordination their attacks failed.  Late in the game the British brought 2 reserve infantry brigades onto the table on the flanks of  Cristoval and they provided support to the heroic garrison who were still holding out.

Lancers versus light dragoons - a long struggle of charge and countercharge
Marshal Jordan’s attack in south on the French left flank made good progress and drove deep into the British line.  The large number of French infantry committed on this front restricted the space available to commit their cavalry reserve.  Wellington committed most of the British heavy cavalry and veteran infantry in reserve on this front.  These additional troops steadied the British line and at the end of the day they had regained a large part of their initial position though at the cost of most of the heavy cavarly . 

British hold firm but French still have the numbers....
On the French centre left Clausel launched an attack in the area of the Watermill to distract British troops from Jourdan’s main blow.  They became engaged in a long fire fight with Portuguese and  British infantry under Pakenham which lasted until the end of the game.  The entire French foreign brigade was lost in this interminable action. 


With this attack stalled Clause then launched his Chasseur brigade forward in an impressive 4 battalion massed column against the Portuguese defending near the church of Calvariza.   The eventually drove back the front battalion of Portuguese but at the end of the game the Portuguese were still facing them in warlike formation and firmly held the old church building.

Portuguese holding firm at Calvariza....
In the French centre right, where I commanded as Soult, the early part of the game was very quiet with some skirmishing and artillery duels.  With the worsening situation on the allied flanks Wellington decided on the second day of play to launch the Spanish supported by a British brigade in an attack on this sector to break through the French centre and so relieve pressure on the flanks and win the battle.


My 2 French infantry brigades made a brave defence even breaking charging British and Spanish infantry with steady closing fire.  My brigade near Huerta was reduced to a single battalion but it was reinforced by a brigade of D’Erlons which crossed the river by a secret ford and was led into the action by King Joseph himself.  I confidently committed my French dragoon brigade against the Combined Portuguese and Spanish cavalry but a shaken stationary Portuguese light dragoon regiment managed to defeat both my regiments in turn.  Eventually after some urgent rallying of the dragoons they succeeded in driving the Spanish horse back beyond the ridge of Calvariza.

Dragoons ride to their initial defeat by the Portuguese.....
In the end I declared the game a draw on the day but the British considered that it was a winning draw on their side.  That might be the fairer result.  The main French attacks had been held and they had not taken any of their objectives.  The Allied counter-attack in the centre had stalled and the French still held a considerable numerical advantage especially on the flanks.

Sunday, September 30, 2012

SCW OVIEDO 16 OCTOBER 1936

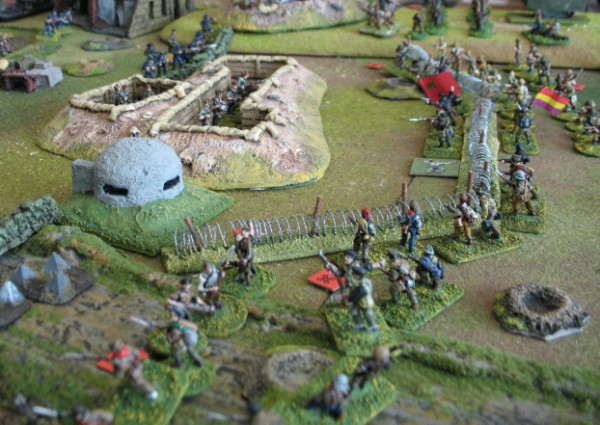
This weeks big game was held at Hugh Wilsons house on Saturday.  It was a Spanish civil War game based on the siege and relief of Oviedo in 1936.  It gave Colin Jack and I the chance to get our rarely used 20mm SCW collections onto the tabletop.  Colin Jack and I provided the figures, buildings and defences while Hugh Wilson provided the rest of the terrain.  I provided the scenario and acted as the umpire.  We used the Triumph Tragedy rules with an amended initiative system.  Thanks to Suzanne Wilson for providing us with a Spanish inspired lunch….

Oviedo and some of its formidable defences
Setup
The game was along a 14ft by 5ft table.  Oviedo and its defenders 3 under strength brigades occupied the last 3ft of the table.  The Nationalist relief column initially of 2 brigades with another 2 due to enter later was at the other end of the table.  The rest of the table was held by the Republican forces made of 9 brigades of anarchist, trade unionist and loyalist militia.
 
Dave Paterson played Colonel Aranda the commander of the garrison of Oviedo with Dave OBrien and Mark Taylor commanding the relief column.  Colin Jack commanded the republican blocking force of 2 brigades, while Donald Adamson commanded the main assault on the town with 6 brigades and Hugh commanded a diversionary attack with the weakest brigade on the Republican left.

Additional equipment, special characters and air support were all controlled by a set of chance cards of which we drew 3 or 4 each turn following turn 1.  Before the play started we drew 4 cards from a Republican subset to add some variety to the militia forces.  These gave the Republicans another 75mm gun, more dynamite bombs, an anarchist leader to inspire a brigade of the blocking force and El Toro - an improvised armoured tractor.

Militia at the wire...
How the game played

Around Oviedo
The Republicans attacked the left side of Oviedo’s defences with a massed assault by 6 brigades.  The brigades attacking over the open flat ground were initially stopped by the barbed wire and the effective fire of the Nationalist machine guns which pinned their raw troops.  The brigades attacking along the ridge at the edge of the table where there was no barbed wire succeeded in overrunning the left most entrenchment held by  a squad of falangists.  It was retaken almost immediately by a police squad acting as a reserve for the defence.   This success did not last for long as it fell again soon after to another militia brigade stiffened by some asaltos who had joined them (another chance card).   A socialist hero joined one of the brigades facing the wire and with the defences breached on the ridge the nationalist line was rolled up as the Republicans stormed over the wire. 
The diversionary attack on the right of the town by an under strength anarchist brigade succeeded beyond any expectations as it got thru the wire and routed the other falangist squad holding an entrenchment.  
The Nationalist commander withdrew his last surviving units from the outer defences into the town hall to make a last stand.    Only at that moment did some succour appear firstly in the form of a nationalist fighter which made a completely ineffective strafing run and secondly by the garrison managing to a refurbish a Trubia tank which rolled out of the barracks towards the town hall.   Things still looked very bad for the garrison…….

Last minute air support as El Toro creeps forward below..

Trubia speeds to support the last stand in the city hall
Blocking Action
The relief column started with the Galicia infantry and volunteer cavalry on the table.   They made steady progress against the militia who had been deployed in depth holding strong buildings.  The Galicia under Mark forced the militia unit holding the first hamlet on the road to flee and then when in the open they were ridden down by the cavalry under Dave O.  The Galicia then attacked the impressive church dominating the road from its hill.  As the Galicia fired at the church the militia defending it were suddenly attacked by a fifth column of priests, nuns, civilians and guardia who had been in hiding in the crypt.  (another chance card)  The clerics were defeated and surrendered to the militia.  One can only imagine their fate.   The volunteer cavalry overran the Republican gun supporting the blocking force and swept on further to overrun the gun supporting the attack on Oviedo.   Who dares say that cavalry has no future role in modern warfare.  The Galicia eventually stormed the church.  The motorised Legion 5th bandera arrived but its early advance was disrupted by a bombing raid by a Republican Potez bomber.  However they pressed on and supported by a FT17 that arrived they took the 2nd hamlet on the road.  At the end of the game their advance squad was approaching the last blocking position on the road.

Militia surrender to Volunteer cavalry

Volunteer cavalry overun the blocking force gun...
We declared the game a winning draw for the Republic - they had not quite achieved their objective of eliminating the garrison but with a mass of raw troops they had achieved more than anyone had expected.  Col Aranda (Dave P) blamed the relief columns obsession with capturing the church for delaying their advance on Oviedo.

5th column emerge from the crypt...Arriba Espana
More photos and descriptions at
http://www.flickr.com/photos/bill26048/sets/72157631652597178/

Here are the player briefing notes and Order of Battle for the game. 

PLAYER BRIEFING
Background
The Rebels did not consider Oviedo, capital of the province of Asturias, as a likely place for a successful right wing revolt, and initially it was considered a lost cause for the uprising. The town was the center of the Asturian October Revolution of 1934, and became an ongoing hive of revolutionary activity since the election of the Popular Front government earlier in the year.
The garrison commander Colonel Aranda was reputed to be a freemason and a Republican, and got along well with the local Republican officials; in addition, the Falange distrusted him.  Aranda declared that he would be loyal to the Republic when the rebellion started on July 17, and he convinced the civil governor and the union leaders that all was calm. So satisfied were the authorities that 4,000 miners left by train for other parts of Asturias and Spain to fight in the growing conflict. Aranda secretly called in Civil Guard and Assault Guard personnel from all Asturias to concentrate at Oviedo. He had gained a reputation in Africa of being a top strategist, and after the miners left, he declared for the rebellion on July 19. The Falange, Civil Guard, and Assault Guard immediately rallied to his side.
Aranda easily took over Oviedo as the republicans panicked, and the rest of Asturias became hostile toward him. Between the two large zones, east and west of Oviedo, Aranda was landlocked and surrounded in the town.  The Popular Front parties and their allied Anarchists began besieging Oviedo on July 20 but there was no serious action until after the fall of the Rebel holdout at Gijon in mid August. 
As the Republicans pressed their final attacks which had started on 4th October, the Nationalists held on grimly, ready to make their last stand. In the distance, they could hear the relief column of the Army of the North attacking. Help had arrived, but would it be in time?

Victory Conditions: The Republicans are the attackers. They must eliminate the rebel garrison before it is relieved. Nationalist must avoid conditions.

Nationalist Notes
Though well supplied with rifle ammunition ( a million rounds at the beginning of the siege) the garrison is running short of MG ammunition.  Its usage needs to be recorded.  The Nationalist player gets 6 d6 worth of bursts from MGs.

Republican Notes
Your forces are mainly made up of workers militia stiffened by a few Assault Guards who remained loyal.  You are mainly armed with rifles but the factories of the industrial zone are working on improvising heavier equipment for the siege.  The Republic’s airforce is active in the area and controls the sky.  It has been bombing Oviedo since September.  The rebels held up in Oviedo must be running low on supplies and it is known that typhoid has broken out in the city.

REBEL/NATIONALIST OB
THE GARRISON OF OVIEDO
Milan Infantry Regt
 2 squads of 10 figures TRAINED
 1 MG
Civil & Assualt Gds
 2 squads of 10 figures VETERAN
 1 MG
Falange/Volunteers
 2 squads of 10 figures RAW
 1 MG
Plus support
Field Gun      TRAINED
1 MG             TRAINED

ARMY OF THE NORTH - RELIEF COLUMN
5th Bandera of the Legion
 3 squads of 10 figures ELITE
 1 MG
Navarese Requetés
 3 squads of 10 figures VETERAN
 1 MG
2nd Galician Regulars
 3 squads of 10 figures TRAINED
 1 MG
Combined Cavalry
3 squads of 10 cavalry figures TRAINED
Plus
Battery of 70/19 mountain guns        TRAINED
Armoured car of the Assault Guards  TRAINED

LOYALISTS/REPUBLIC OB
1st REPUBLICAN Militia Column:
3 squads of 10 figures RAW (dice for MG on a 4,5,6)
2nd REPUBLICAN Militia Column:
3 squads of 10 figures RAW (dice for MG on a 4,5,6)
3RD  REPUBLICAN Militia Column:
3 squads of 10 figures RAW (dice for MG on a 4,5,6)
1st ANARCHIST  Militia Column:
2 or 3 squads of 10 figures RAW (dice for 2 or 3, dice for MG on a 4,5,6)
2nd ANARCHIST  Militia Column:
2 or 3 squads of 10 figures RAW (dice for 2 or 3, dice for MG on a 4,5,6)
3rd ANARCHIST  Militia Column:
2 or 3 squads of 10 figures RAW (dice for 2 or 3, dice for MG on a 4,5,6)
1st CNT Militia Column:
2 or 3 squads of 10 figures RAW (dice for 2 or 3, dice for MG on a 4,5,6)
2nd CNT Militia Column:
2 or 3 squads of 10 figures RAW (dice for 2 or 3, dice for MG on a 4,5,6)
3RD CNT Militia Column:
2 or 3 squads of 10 figures RAW (dice for 2 or 3, dice for MG on a 4,5,6)
plus
Battery of 75/27 field guns RAW

Saturday, September 22, 2012

NAPOLEONIC REDINHA 1811

This week game at the SESWC was a 28mm Napoleonic Peninsular War game played with Black Powder.   It was based vaguely on a rearguard action by Marshal Ney’s 6th Corps at Redinha on 11 March 1811 during the retreat from Portugal.

The fight in the cornfield - Irish column vistorious....
The Setup
I provided the scenario and Angus Konstam provided the pursuing Anglo-Portuguese forces whilst I provided the French.  We played down a 8ft by 6 ft table.  We used full scale movement and the revised sequence of play.  The French had three 3 battalion infantry brigades, a 2 regiment Chasseur a Cheval brigade and a single gun.  The Anglo-Portuguese had two 3 battalion British infantry brigades, one with a detachment of riflemen, a 4 battalion Portuguese brigade with 2 rifle detachments,  and a cavalry brigade of British Light dragoons and KGL Hussars.  Each of the allies had a gun.
 
Myself and Mr Ray commanded the French with 1 brigade and our single gun holding the farm and the line of the stream to its left, 2 infantry brigades were held back in reserve in attack columns and behind them were the chasseurs.  Angus deployed the allies with their cavalry on their  right flank, a British brigade in the right centre and the Portuguese commanded by Bart on the centre and left.  The remaining British Brigade was held of table intending to advance down the road - this was commanded by Campbell when he arrived later.

French army deployed - 1 brigade forward others in reserve

The allies took the imitative as the attackers and Angus sent his light cavalry across the stream on the allied right flank whilst the 1st British brigade engaged the French centre, Bart engaged the farm with his skirmishers and sent 2 battalions across the stream on his  left to outflank the French line.  The battle developed in these 3 sectors - the cavalry action on the allied right, the fight in the centre across the stream and the action around the farm with the flanking attempt.

The cavalry action - after much delay I managed to get the Chasseur brigade to move forward and take position on the French left on windmill hill were they observed the British light cavalry crossing the stream.  The initial charges saw the engaged regiment from each side retiring from a draw.  Then the KGL Hussars charged the other Chasseur regiment who counter charged and drove them back.  The Chasseurs then made a sweeping advance into the already shaken British light dragoons who could not react to the sweeping advance and broke them.  The KGL retired back beyond the stream and I followed up over the stream with both my regiments hoping to flank the allied army but the final charge ended in a draw with both sides retiring yet again.

British cavalry about to cross the stream......to their defeat.

In the centre - the British quickly lost their gun to lucky or skilful shooting by the single French gun.  The British moved forward  to the stream and silenced our French gun.  The French Irish legion battalion holding the road broke the British battalion facing it with their first volley!  Angus crossed the stream with his remaining 2 British battalions and charged a French battalion - who broke the lead British battalion in the melee.  The British survivors threatened by the arrival of French reserves withdrew back across the stream and waited for the arrival of the 2nd brigade under Campbell who moved forward and continued the action in the centre.  Eventually Campbell attacked across the ford into the by now shaken Irish battalion but they drew the melee.  The shaken British battalion retired back over the stream but the plucky Irish broke and fled.

British charge French as reserves move up

Last fight of the galant Irish - drove back their opponents but broke
The farm and allied left - Bart screened the farm with his skirmishers and crossed the stream to its right with 2 battalions while holding 2 battalions back as a reserve.  We countered by moving 2 battalions from our right wing reserve brigade to engage them.  Our other battalion of the Irish legion charged and after 2 rounds of melee broke a Portuguese battalion.  They then engaged the other forward Portuguese battalion in a long indecisive fire fight.   With the game running down the reserved Portuguese battalions attacked the French infantry holding the farm but were held in a drew.

Portuguese flanking move across the stream....
The allies lost 3 battalions and a cavalry regiment whilst the French lost 1 battalion and still held the line of the stream at the end of the game.  It was a great game - lots of moves and action in the 2 hours we took to play it. 
More photos and descriptions at
http://www.flickr.com/photos/bill26048/sets/72157631590385810/

Friday, September 14, 2012

Borodino - a bit of a fleche

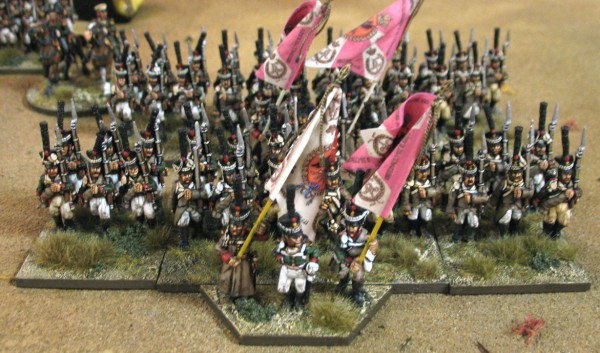
This weeks game at the SESWC was a long delayed Napoleonic game using the Black Powder Rules for Dave Imrie who had only used the rules in an AWI game previously.  It allowed Dave to put his impressive Russian Grenadier Division onto the table top.

Russian grenadiers...URRAH!
The Setup
The game was fought across a 8ft by 6ft table. We used the 66% movement and range version of the rules.  The table represented part of Borodino near the Bagration fleches which we represented with 2 redoubts.

The terrain on the table was open ground except for woods lining the southern edge of the table.  The Russians had 2 brigades each of 4 battalions of grenadiers and a cavalry brigade with a large cuirassier regiment and a Don cossack regiment.   Dave deployed a grenadier brigade around each of the fleches/redoubts with the cavalry split between the flanks.  A battalion and a gun occupied each of the redoubts

Garrison of a fleche - we counted them as 1 gun and a battalion
My French force comprised two 5 battalion infantry brigades each with a gun on the table with a chasseur brigade and a mixed curassier and lancer brigade in reserve of the table.

I made all the commanders 8s for this game. 

How the game played
Dave stood on the defensive and I threw an infantry brigade against each of the redoubts.  My initial attack on the redoubts proved a disaster as the first 2 battalions to charge in broke when suffering artillery hits.  Eventually I got a battalion to charge into the left hand redoubt but after 2 rounds of combat it broke and a supporting unit followed it from the field. 

Attack on a fleche - right hand unit broke to the artillery fire...
Dave had moved his cuirassiers to support his centre and I decided to attack them using my more numerous cavalry who had arrived on the table.  I ordered the chassuer brigade to charge and they blundered and retired from the table.  I immediately ordered the cuirassier lancer brigade to move to fill the gap left by the chasseurs.  They blundered and also retired from the table!  My dice were 6, 6, 2, 6, 6, 2.

The unfortunate dice - its a blunder of the table
This left me with 5 infantry battalions and 4 guns on the table.  Dave then decided to go over to the attack and charged 2 of my guns with his cuirassier regiment.  My guns scored 3 hits and the cuirassiers broke when they tested for the artillery hits.  That single success was the last action of the game……

It was a good game and took 2 hours to play.  The game was characterised by amazingly poor break tests dice rolls, truly appalling musketry fire, very good artillery fire and  excessive blunder rolls!  Dave is away to build some more realistic fleches for a bigger version of the game....

Friday, September 7, 2012

Battle of the Yellow Sea 1904

My game this weeks at the SESWC was a naval game - the Battle of the Yellow Sea in the Russo-Japanese War 1904. Colin Jack supplied the 1/3000 models for the game and we used Angus Konstams 8ft by 6ft sea mat.

Bart and I commanded the Russian fleet of 6 battleships and 4 protected cruisers. Colin Jack, Mr Ray and Campbell commanded the larger Japanese fleet of 4 battleships, 2 armoured and 8 protected cruisers. We used the simple Perfidious Albion rules.

Russian Fleet
The action started with the Russian fleet engaging the Japanese battleships and the 2 armoured cruisers. The 8 Japanese protected cruisers arrived on the table later. Our early battleship advantage proved illusory as only 3 of our battleships had first class guns compared with all 4 of the Japanese - our other 3 battleships with their second class guns proved ineffective. The Japanese battleships generally also had heavier armour than the Russians.

Japanese fleet
In the long battleship action my flagship the Pobieda suffered most damage - losing a turret, suffered 2 engine hits, multiple fires and the conning tower with the squadron commander was destroyed. Our cruiser squadron steamed to delay the arriving Japanese protected cruisers but 2 of them succumbed to the heavier guns of the Japanese cruisers.

My squadron led by Pobieda....