Friday, September 30, 2011

Canadian Arctic 1944......

This week I did not go to the SESWC as Colin Jack was again stuck at home so Hugh Wilson and I visited Colin for a game and a meal.
Colin put together a test of his PP game for the upcoming Skelp show in Forfar next weekend.

Heroic Mountie with his faithful dog or is it a wolf...
 Link to Skelp info is here
http://anguswargamesclub.com/index.php?p=1_9_Skelp-2011

The game is set in the Canadian Arctic in 1944 and involves 2 teams of German saboteurs crossing the arctic wates to blow up a crash landed experimental German flying saucer! On the way they have to contend with the local inuit people, canadian hunters, special events  and a single mountie with a dog. Why would you ever need more than 1 mountie!

We played the game thru twice and simplified and revised the already simple rules.  Some photos from the test are below - I will add in more from Skelp and will publish the rules then.

German submariners land from Das Boot...
Canadian trappers looking for a moose...

Saturday, September 24, 2011

Vyazma 1812 - 2nd attempt

This weeks big game was held on Saturday. It was a variant of my previous Black Powder Vyazma 1812 game this time played down a bigger table with more time available.

Organising the game
The game was fought at my house on a 12ft by 6ft table using my terrain. I provided the scenario and all of the figures. There were 4 players and I umpired. John Glass played Marshal Davout supported by Hugh Wilson. John Perkin played General Miloradovich supported by Brian Phillips. I have added a special Vyazma 1812 page which gives more complete information on the game setup, rules used, the player briefings, arrival schedules and order of battle.

Franco-Bavarian light cavalry toast their upcoming success - prematurely!

Setup
The French army deployed with 2 infantry brigades (Friant and Gerard) on the table with their further 2 cavalry brigades and 3 brigades of infantry in reserve of table. The Russians deployed with an infantry brigade and their light cavalry and dragoon brigades on the table with the bulk of their troops flank marching of table. The initial Russian force formed their line centred on the hamlet of Maximovka held by the infantry with the Dragoons on the left flank near the forests and the light cavalry supporting the artillery massed on the heights to the south.
View from Vyazma - Russians move to Maximovka - French in distance


The photos are on my flickr site at
http://www.flickr.com/photos/bill26048/sets/72157627743328192/

How the game played
The Russian plan was defensive - to disrupt and slow the French advance with their artillery and then musketry whilst waiting for their reserves.
The French decided on a policy of a steady advance waiting for their reserves to arrive on table before seriously contesting the Russian line. To the left of the highway John commanded 3 infantry brigades and the heavy cavalry while to the right of the highway Hugh commanded 2 infantry brigades and the light cavalry. The light cavalry took many turns to arrive on table and then refused to move. Hugh’s Irish Legion once they were on table also were very tardy in advancing. Given the delays on their right the main French assault went in on the left.

French heavy cavalry move to strike the first blow

The French heavy cavalry brigade moved quickly to the left threatening the Russian artillery on the heights. The Russians countered by throwing forward their hussars. They charged the dragoons who forced them to retire. The dragoons made a sweeping advance and hit the supporting regiment of hussars but this action ended as a draw and both sides retired to recover.

Morand's Swiss advance with expected precision on Maximovka

The advance on Maximovka was led by Friant and Desaix’s brigades. They found it slow going and became bogged down with disorders and shaken units as the Russian artillery and infantry proved effective shooters. Eventually to reach Maximovka both brigadiers used Follow Me orders to lead single battalions into combat with the Russian battalion holding the fenced track linking Maximovka to the highway. Despite this heroic leadership the Russian defenders from the Perm Regiment held them back. The Joseph Napoleon battalion was ordered to support this attack but blundered and retired a move. Eventually John had to commit Morand’s Swiss brigade against Maximovka and the fence line. At a heavy cost they forced their way over the obstacles and drove one Russian battalion out of Maximovka.
Grim struggle for Maximovka - Swiss enter the fray

After a long period of inactivity due to planning or was it simply bad command rolls the French heavy cavalry once again ascended the heights to engage the hussars. This time led by the carabiniers they broke the Grodno hussars and seeing this the supporting Elisavetgrad hussars broke and followed their comrades from the field. Whilst this action had been going on 3 brigades of Russian infantry had arrived from the south. The first moved to reinforce Maximovka the second moved to reinforce the centre and the third remained on the heights. The French heavy cavalry now faced a mass of Russians on the heights.
The French carabiniers - colourful and victorious
The advance on the French right was very slow given the appalling command rolls on that side. By lunchtime Marshal Davout (John) was seriously considering relieving his subordinate on that flank. Their advance was also disrupted by Russian troops appearing from the north. First a sotna of cossacks arrived but they were quickly broken by a combination of horse artillery fire and charging hussars.


Hussars charge home on standing disordered cossacks

Then an infantry brigade arrived and driving them back absorbed most of the troops from Compan‘s and Gerard‘s brigades supported by the hussars. Only the Neuchatel battalion and the Bavarian chevalueger regiment engaged the main Russian line. The chevaluegers forced a Russian battalion into square and it was then charged by the Neuchatelers. This became an epic fight as the square stood against the attack column for at least 6 rounds of melee losing every round but passing its morale tests until they eventually broke. After this the Russians finally committed their dragoons on their left flank. The Moscow dragoons drove back the chevaluegers and swept forward striking the end battalion of Morand’s Swiss in the flank. The Swiss stood and turned to face their attackers but then broke - this was the last action.

Engaged at Maximovka french infantry face flank threat from dragoons
At this point our time was up and the French commanders were despondent. The French right was scattered and in disarray, the French left was embattled on the Maximovka line having lost heavily and was now threatened with being rolled up from the right by the rampant Russian dragoons. In addition they could see 10 fresh unengaged Russian battalions between the heights and the highway with more artillery. The Russians still had a regiment of Cossacks that could appear to the northeast of the French. In addition Uvarov’s Cuirassier brigade was approaching from the south but I did not allow them to appear due to the congestion on the heights and the fact that things were going so well for the Russians.

Overall a fun big game with some truly appalling command rolls from the French side and some equally amazing morale rolls from the Russians.

Friday, September 23, 2011

WWII Ardennes - but not 1944

This week I did not go to the SESWC. Colin Jack was stuck at home so Dave O'Brien and I visited Colin for a game and a meal. Colin put together a 28mm WWII game using Rules of Engagement - set in the Ardennes - but not in 1944 - this was an early war game pitting Belgian troops against a German column of 7th Panzer Division advancing to the Meuse.

Vive la Belgique - Sd222 explodes under 25mm fire
The Setup
The game was fought along a 8ft by 5ft table. The German column commanded by Erwin Rommel (Colin and Dave) had to traverse the length of the table and exit from the other side. The terrain was a single narrow road flanked by heavily wooded hills. In this type of terrain the vehicles could not operate of the road. Any vehicle that broke down or was knocked out had to be pushed of the road. The Germans had 3 PZ38T tanks, a lorried infantry platoon, a Sd222 armoured car and a Kfz13 command vehicle. The Belgians had an understrength infantry platoon and their heavy equipment comprised a 25mm ATG, a hotchkiss MMG, a mortar and a T15 tank!

German column backed up behind burning SD222
How the game played
The Germans drove down the single road lead by their Sd222 armoured car. As it rounded a bend it was destroyed by a well placed shot from the 25mm ATG. This was the high point for the Belgians. As the first German infantry deployed from their truck they came under very ineffective fire from a section of Chasseurs Ardenais. Heavy fire from the surprised Germans forced the shaken Chasseurs to flee deeper into the forest.

Chasseurs surprise German infantry....
A PZ38T pushed the Sd222 of the road and engaged by the 25mm ATG in a duel. It was joined by a 2nd PZ38T and they and Rommel in his command car overwhelmed the ATG and its supporting MG with a hail of MG fire. The 2nd Belgian infantry squad had now ambushed more German infantry who charged and wiped out the Belgians. The road to the Meuse now seemed open to the Germans but as they rounded a final bend they came under fire from the Belgian T15 tank. Armed with a HMG the T15 could only damage the tracks of the the PZ38Ts but it put up a galant fight - the crew bailed out and then remounted their tank - only for them to be forced to bail out again. At this point a PZ38T pushed the unmanned T15 into the ditch! I commanded the Belgians and my dicing for shooting was remarkably poor - the mortar proved completely ineffective.
Massed German armour closes on the vital ATG
Now that we have worked out how the hiding rules work and are doing firing correctly the game play works better. I like ROE but I am still not completely sure about the artillery rules.
Galant T15 engages the German might

Saturday, September 17, 2011

This week - WWII Reinforcements

I did not get to the SESWC this week so there is no new game to report. My stepson Alex came to visit us from Moscow for the first time in 5 years so it was a busy week at home.
As I said before I have 2 main projects at the moment - continuing to add units to my AWI collection and building up my Russian and French forces for the 200th Anniversary of the battle of Borodino in 2012. The other major part of my collection to which I continue to occasionally make additions is my 20mm WWII collection. Here are some new additions.

The first 2 photos are of models that Alex brought me from Moscow. There are a pair of Katyusha rocket launchers and a SU122 SPG. They are ready built 1/72 models from the Russian Tank magazine collection which is sold in Russia. I have dry brushed the models with sandstone and mounted them on the new smart pill (cartouche) shaped MDF bases from Warbases


The other photo is of a German Wirbelwind Quad 20mm AA SPG which I bought painted on Ebay with some other vehicles. I have been looking for a Wirbelwind for quite some time so bought the lot to get the wirbelwind. The others I have resold on Ebay. I have finished this the same as the new Russian Tank models.

Alex also brought me 3 of the very impressive T35 models from the Russian Tank Collection - I am still thinking about how to base those dreadnoughts.

Friday, September 9, 2011

More AWI - based on Cowpens 1781


Rash advance of the British 1st Brigade.....
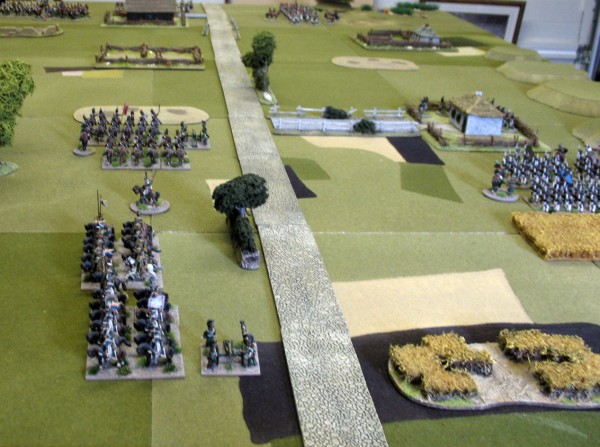
This weeks 28mm AWI game that I arranged at the SESWC was roughly based on the Battle of Cowpens 1781 using Black Powder Rules. The Battle of Cowpens was a battle of the American Revolutionary War that took place on January 17, 1781. The actual battle was a crushing victory for the Patriot's with the British force being annihilated with only the cavalry escaping in any numbers.  Here is link to flickr photo set

http://www.flickr.com/photos/bill26048/sets/72157627640141316/

The Setup
The game was fought across a 8ft by 6ft table. We used full scale movement and ranges. The 24 figure infantry units were classed as standard units, the 12 to 16 figure infantry units as small units. The 12 figure cavalry were a standard unit and 6-8 figure units were small. The figures used are mainly Front Rank with Old Glory British Legion. Dougie Trail and Bart the Pole commanded the British Army with Hugh Wilson and Tim commanding the Patriots. I umpired. I used the OB below based on the strengths calculated by Lawrence E. Babits in his A Devil of a Whipping: The Battle of Cowpens.

Patriot Force Morgan 8
Continental infantry 24 figures
States Infantry 16 figures
Virginia Militia 16 figures
North Carolina Militia 16 figures
Virginia Riflemen 12 figures skirmishers

South Carolina Militia Brigade under Colonel Andrew Pickens
1st Spartan Militia 24 figures
Little River Militia 24 figures
Fair Forest Militia 24 figures
Skirmishers 12 figures

Reserve
Cont Dragoons 6 figures
State dragoons 6 figures

Fusiliers in a bad state.....
British force Tarleton 8
British Legion cavalry 12 figures
British Legion cavalry 8 figures
British Legion infantry 24 figures
7th Royal Fusiliers Regiment 16 figures
71st Highlanders Regiment 24 figures
Combined Light infantry 12 figures skirmishers
Royal Artillery with a 3-pounder cannon

How the Game Played
We actually played out this game twice in a club night

In the first game I allowed the Patriots a free deployment so they deployed in a single long line with the cavalry on both flanks. The first British Brigade - Legion Infantry and 7th Fusiliers - screened by the skirmishers rushed forward with a 3 move turn up to the Patriot line. The Patriot militia the charged the skirmishers who evaded and the militia then fired at close range into the 2 British units. The British Legion infantry then charged the militia facing them who made them shaken by closing fire. The Legion had to test and retired and then broke uder musket fire. This left the 7th Fusiliers engaged by 3 units. To their right the Highlanders charged home on the state troops and after 2 rounds of combat they were forced to retire. They were then charged in the flank by a militia units. This ended the game as a contest after only 3 turns taking 75 minutes with 2 of the players not knowing the rules. The legion cavalry did nothing in the 3 turns and the British shooting was very ineffective.
Militia crash home on flank of highlanders...ending game 1

For the 2nd game I revised the Patriot OB by reducing the South Carolina Militia Brigade to -
1st Spartan Militia 16 figures
Little River Militia 16 figures
Skirmishers 12 figures

In addition I got the Patriots to deploy more historically with the skirmishers thrown forward, then a line of militia and behind them the Continentals and State troops with the 2 small cavalry units in reserve behind the hill.

Patriot left wing held back to face the Legion cavalry..
This time the British took a more cautious approach manoeuvring to mass their 3 infantry units together as a firing line facing the Patriot right whilst threatening the Patriot left with their cavalry. However the Patriots did not stand on the defensive and advanced on the cautious British - once again they deployed effectively into one long line. The battle on the British left developed into a long range musketry duel which did little major damage. On The British right Bart decided to throw both his cavalry units into the Patriot riflemen intending to break them and then exploit with a sweeping advance onto the militia behind hem. A bold move - but it failed entirely. The Skirmishers with 4 dice drew with the 10 dice of the Legion cavalry both units of which then had to rally back. They then came under fire from the militia and their resulting disorders prevented them doing anything else. Hugh remembering the poor performance of the Legion infantry in the first game decided to throw both his small cavalry units into the Legion infantry. This time they stood their ground - drawing with the Patriots and forcing both the cavalry units to rally back. At this point we had to pack up - but it still looked to be a long hard desperate fight for the British.

Patriot cavalry charge into the Legion foot...
Rule changes
We used the amended turn sequence in this game and my revised rules for moving in forests. In addition we decided that it was more realistic not to allow units to interpenetrate as part of a charge move. The British Regulars units - the 7th Fusiliers and the Highlanders - were both Terrifying when charging militia - only problem was that they never charged militia during the game.


Monday, September 5, 2011

Aqaba 1917

This week’s big game was held on Saturday at RAF Leuchars. It was organised by Jed Harbride-Rose of the RAF Wargames club who is obviously a fan of the 1962 David Lean film Lawrence of Arabia.

Lawrence struts his stuff...
The day was a 28mm series of actions leading up to and including the Arab cavalry attack on Aqaba. It was an opportunity for people to field all their troops and terrain for this period.
 
Aqaba town - in distance the fort and railway
The three actions were:
Firstly an attack on a Turkish armoured train on the Hezaz railway by Arab insurgents. Stopped by a demolition on the track and then attacked by 3 units of Arab foot the Turkish unit manning the train soon abandoned the train and fled up the track back to Medina. This allowed Lawrence of Arabia to strut his stuff on the roof of the train.

Turkish airpower slows the column
Secondly an attack on the fort guarding Aqaba undertaken by Anzac and Arab forces. The imperial motorised force had to approach the fort in a long single column and came under air attack by the Turkish airforce. Despite this and a major action between each sides armoured cars the Anzacs assaulted the fort but were driven back by the garrison. However MG fire from the imperial armoured cars was sufficient to break the garrison and allowed the Hezaz regulars to raise the Union flag above the fort.

Anzacs scale the walls of the fort
Finally the massed Arab cavalry and camelry charge into Aqaba town supported by Royal Navy gunnery from offshore. The RN engaged and suppressed the heavy Turkish coastal guns which as per the film only looked out to sea.

Arab cavalry and camelry begin the great charge

Heavy Turkish gun - tragically only looking out to see

The Arab charge largely ignored the initial landward defenders and raced into the narrow streets of Aqaba. They quickly captured the Governor’s palace and the pompous governor and swept on to take one of the two coastal gun positions. At this point the Turkish players decided that all was lost and agreed a surrender with Lawrence.
Arab forces enter the narrow streets of Aqaba

In the twilight Arab forces storm the governor's palace
  http://www.flickr.com/photos/bill26048/sets/72157627585824790/

Link to Flickr photoset of the game

 
There were 5 players myself, Hugh Wilson, Jimmy Conquer, Brian Cunniffe, Chas Richards with Jed umpiring. The table was approx 20 feet long, 6 feet wide all down the narrow bit, and then 9 feet wide at both ends. The Royal Navy was on another table! We used Jed’s Home for Christmas rules.  It was fun and it looked great!  Many thanks Jed!