Friday, December 30, 2011

Napoleonics - Big Borodino and Club game

This has been a week for Napoleonics.

On Wednesday a few of us from the Edinburgh club were invited to take part in a refight of Borodino, laid on by the Leuchars Wargames Club. Leuchars is about 50 miles north of Edinburgh, close to the university town of St. Andrews.

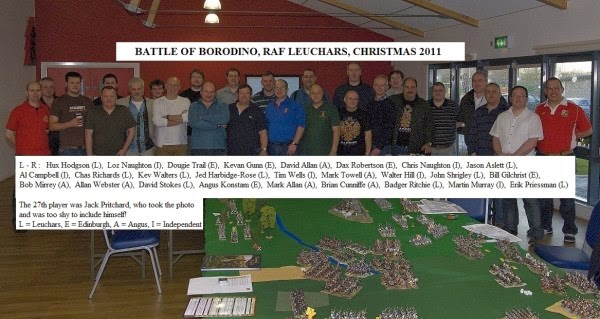
The players at Leuchars grand Borodino game
I'd already lent my Russian army for the game plus a good force of French and allies. For domestic reasons - my wife is from Moscow - naturally when the two dozen players chose sides, I opted to join the Russian team. I was given VIII Corps to command, and also given the role of Bagration, commanding the Russian 2nd Army of the West. This army held the Russian centre, with its defences concentrated on the 3 Bagration fleches.

The 32 foot long table used green baize mats and minimal terrain apart from an excellent Grand Redoubt and the Bagration fleches. However, it was positively groaning under the weight of the lead. The rules we used were General de Brigade (2nd edition), slightly modified to encourage faster play in large-scale battles. I had only read these briefly before the game but the Leuchars club produced an expanded 7 page QRS which worked well.

Fleche A - ineffective canister fire at charging cavalry....

It was a good massive game. My dice rolling for command was good but for combat and morale it was truly appalling. Both batteries defending the fleches rolled double 1s and ran low on ammo in the first 2 turns and the first 3 infantry battalions I tested to stand to cavalry charges all retreated or routed!!! My poor dice rolling infected the commanders of the reserves who came on either side of VIII corps and they both faired badly.

A fuller desription of the battle with more photos is on Angus Konstams Edinburgh Wargames site.
http://www.edinburghwargames.com/Journal%2065.htm

On Thursday at the SESWC we threw together a 7 player Black Powder Napoleonic game based on the troops that everyone had brought along. It became a Peninsular War action with an Anglo-Portuguese-Spanish force defending a line of hills and the villages and enclosures in front of them. The attackers were a division of French supported by a division of Bavarians.

French and Swiss charge Rifles holding walled enclosure
I commanded the Bavarian centre which was to break thru the Portugese holding the gap between the hills. This did not quite happen as the French commanders on my left blundered 3 times in the first 3 moves and repeatedly retired. The Bavarian right were held up by the appalling command rolls for their supporting cavalry and hardly got into action. My 2 brigades were stopped by heavy musketry fire from the Portuguese supported by the British and Spanish and the low point was when a Bavarian column broke against a Spanish Irish line. I was not making any progress and the French on the left after taking a walled enclosure were stopped by effective British musketry. A good game for a club night - especially as it was a quick improvised scenario.

Irish Spanish battalion breaks charging Bavarian column...

Bavarian Chasseurs suffer heavy casualties from allied musketry
We used 66% scale for movement and ranges. The British and French commanders were rated 8 while the Spanish and Bavarians were rated at 7. The French infantry were Reliable in attack colums and the British had First Fire. The Spanish line infantry were poor shots (-1 on shooting) and were reduced to 5 hand to hand dice.

Thursday, December 22, 2011

WWII - Battle of the Bulge game

Due to family commitments last week I did not managed a game at SESWC on Thursday. However on Tuesday this week we played a 20mm World War II action using the Rapidfire rules at Hugh Wilson‘s House. Hugh provided the basic terrain, Colin Jack provided trees and buildings and I provided the troops. Thanks to Susanne Wilson for providing the vital food supplies.  The set-up of the game was based on the Tigers in the Snow scenario by Steve Ord which I found on the Internet.  It was a good excuse to get my King Tigers out again.

This fictional scenario is based on the efforts of the Sixth Panzer Army as it carried out the main effort along the Northern flank of the German push into the Ardennes. The action takes place just to the North of Malmedy and is deemed to be a ‘stalling’ action for the Americans as they try to hold off the might of the SS Panzers. The US forces are composed of troops from the 2nd Infantry Division a veteran unit from V Corps. Attached to the infantry are elements of the 102nd Cavalry and the 9th Armoured Division. Elements of the 12th SS Hitler Jugend Panzer Division make up the German forces.

Here is the map we used based on the original by Steve Ord


How the game played
Colin Jack commanded German Battlegroup A and Hugh Wilson Battlegroup B. Mr Ray Neal of Connecticut and Dave Paterson commanded the American defenders. Ray deployed the infantry battalion and M4 Shermans to defend the southern route and the village whilst Dave deployed the recon battalion and M18 tank destroyer company in ambush positions on the northern route.
Given their time constraint both German battle groups raced their infantry units forward. Battlegroup A motorised infantry suffered losses from the M18s and the recon troops and were forced to deploy on the northern road to await their armoured support.

Concealed M4 about to spring trap on battlegroup B
The armoured infantry on the southern route came under fire from Shermans but advanced on towards their village. Their armoured support came onto the table in a coherent mass and quickly joined in the action against the Shermans and the infantry battalion. Once the fog cleared the US artillery began to intervene and indirect fire knocked out a Stug and a PZIV. An effort by the armoured infantry simply to drive down the main route led to disaster as 3 SD251s were lost on the hidden minefield that the Americans had deployed at the road junction. Hugh decided then to launch his remaining armour cross country around the village but more vehicles were lost to M4 and bazooka fire.

The flank attack - more columns of smoke rise from Battlegroup B vehicles
On the northern route the King Tiger company got into action but as the rounded the bend leading to the village the leading King Tiger was destroyed by a single shot by a M18. This caused the remainder of the company to retire 2 moves blocking the road for the rest of the armour of Battlegroup A who were late arriving. The German armour renewed their advance and once again the leading King Tiger was destroyed by a M18!

M18 giant killer - the leading King Tiger explodes
With German confidence ebbing away the remaining King Tigers moved cross country and managed to destroy 2 of the M18s. This rare success on turn 10 was negated by the Hitler Youth Panzer Grenadiers being defeated when assaulting the remnants of a US infantry company. We all agreed that it was clearly a US victory…largely based on amazing dice rolling - 6 after 6 after 6 - and as Ray and Dave claimed good tactics!

Here is link to FlickR photoset with descriptions of all the actions photos
http://www.flickr.com/photos/bill26048/sets/72157628510107833

Here are the orders of battle and the player briefings

German Order of Battle
German Battlegroup A
Mot Pz Gren Btn
HQ CO + 5 Panzerfaust 1 x Horch carrier
Rifle Company 7 figures Panzerfaust 1 x Truck
Rifle Company 7 figures Panzerfaust 1 x Bus
Support Company 6 figures 1 x MG42 MMG 81mm Mortar 1 x Maultier
Tank Btn
HQ 1xTiger II, 1 x Wirbelwind Quad 20mm AA
Coy 3 x Tiger II
Coy 1 x Pz III

German Battlegroup B
Armd Pz Gren Btn
HQ CO + 5 figures Panzerfaust 1 x 251/1
Rifle Company 7 figures Panzerfaust 1 x 251/1
Rifle Company 7 figures Panzerfaust 1 x 251/11
Rifle Company 7 figures Panzerfaust 1 x 251/1
Support Company 6 figures 1 x MG42 MMG 81mm Mortar 1 x 251/1
Tank btn
HQ 1x Pz IV
3 x Pz IV
2 x Stug III

US Order of Battle
Infantry Btn
HQ CO + 5 + FOO 60mm Mortar Dug In
Rifle Company 9 figures Bazooka Dug In
Support Company 12 figures HMG, MMG, 81mm Mortar, 57mm A/T Gun Dug In

Recce Btn
HQ CO + 5 figures 60mm Mortar 1 x M3 HT
Rifle Company 6 figures Bazooka 1 x M3 HT
Engineer Platoon 4 figures 1 x Flamethrower 1 x M3 HT

Tank Btn
HQ 1 x M4 Sherman75mm, 1 x M4 Sherman 105mm
Coy 3 x M4 Sherman 75mm
Coy 3 x M10 TD

German Objectives and Set up
You have 12 turns to smash through the Americans who are trying to buy time and to allow their reserves to arrive and counterattack.
The Germans must smash through the American defences and exit at least 50% of their force of the road in terrain square A2 otherwise they have failed.
The Germans are split into two Battlegroups, A and B, with their infantry arriving first in an effort to create a clear path for their armour to pass on towards the Meuse.
On turn 1 the motorised infantry of Battlegroup A arrives on the road in terrain square E3. On turn 2 the armoured infantry of Battle group B arrives on the road in terrain square E1. The German armour could possibly start arriving from turn 4 onwards.
Each German armoured company, including any HQ unit, must roll 3+ on a D6 to move onto the table. If they fail the unit can try again at the start of the following turn. The armour of Battlegroup A will arrive on the road in terrain square E3 and the armour of Battlegroup B on the road in terrain square E1.

American Objective and Set up
You have 12 turns to defend against the Germans, holding them up for as long as possible in order to allow your reserves to arrive and counter attack. The American forces can be ‘dug-in’ and should be difficult to spot until the enemy are very close.
The American forces can deploy anywhere to the West of the line indicated on the scenario map. The exception to this being the Infantry HQ which must deploy in the farmhouse.
From the turn following the improvement in visibility (see the special scenario rules) the American FOO can call for artillery. Artillery should be limited to 2 105mm Howitzer Batteries This may be limited due to the speed of the German assault and the demands on artillery from multiple sectors.

Special Scenario Rules
The game begins early in the morning and a heavy mist has fallen over the snowy terrain. As a result visibility is limited at the start of the game. Visibility should be halved for the first 3 + D3 turns.
Any vehicle moving into the bog indicated on the scenario map will become stuck and must be abandoned on the following turn. Note that the bog is not impassable to infantry. The area of rough ground between the two approach roads is impassable to all types of unit.
The dense hedges along the roadside offer cover for Anti-Tank guns and infantry but not vehicles. Tracked vehicles can move over these hedges at no penalty, troops and wheeled vehicles must subtract D6 inches from their movement to cross them.
The walls of the various houses are stone and offer hard cover to troops. The wooded areas will block line of sight. In this scenario destroyed vehicles blocking the road can be moved D6 inches off the road by any vehicle of a similar size or larger.
The American player can place one 4 inch square mixed minefield in any location West of the Initial American deployment zone as indicated on the scenario map. This should be marked on the American players map before play begins.

Monday, December 5, 2011

Japan 1614 - Battle of the Bridge at Konaga

This game was a fictional action set in Japan in 1614 played using the Gleaming Katanas samurai of the variant Black Powder Rules.
Hugh Wilson and Colin Jack commanded the Toyotomi faction whilst Olivier Lepreux and myself commanded the Tokugawa faction. Donald Adamson came up with the scenario which was a combination of 2 of CS Grants Table Top Teasers and also acted as the non playing umpire. Hugh Wilson provided most of the terrain with some of the buildings coming from the collection of Colin Jack. Hugh, Donald, Olivier and Colin provided the figures - for once I was a freeloader! My thanks to olivier for both playing and also cooking us an excellent chicken Marengo....an idea for another game.

The bold but doomed advance of the Tokugawa into the forest of shinzo
 The game was played with the 66% version of the BP rules - reducing movement and firing ranges but we kept command, proximity and support distances to their norms.

It was a fun game but both Tokugawa forces failed to take their objectives - Olivier was stopped by the heroic reaguard of Hugh's troops at the bridge whilst my command moving thru the forest lost more than half its strength and never got beyond the woodcutters hut.  The Ashigaru shot troops and their Portugese allies proved deadly in the forest fighting!

Here is the link to FlickR photoset with descriptions of the photos.
http://www.flickr.com/photos/bill26048/sets/72157628281133973/

Terrain
The game was fought across a 9ft by 6ft table. This size and the design of the scenario allowed the game to be played comfortably by 2 players a side. The main feature of the terrain was the river with the vital bridge and ford which had to be held by the Toyotoni faction. The other main feature was the forest of Shinzo thru which the right wing Tokugawa force had to pass to reach the ford. The sketch map is below.
Sketch map of the battlefield
The briefing notes for the 4 players which Donald prepared are included below.

The Bridge at Konaga - Tokugawa Iestu
The year is 1614, and you command a force of 14 units
Situation - You have been at Tumbo Mountain since early this morning. Your force has been sent ahead of the main Tokugawa army with orders to seize the bridge and crossing of the River Koneso at Konaga. You are supported by a force to the East, commanded by Tokugawa Ifan, which is seeking to seize a ford over the Koneso.
Mission - Your mission is to seize the bridge crossing at Konaga, and thus allow the Tokugawa army, which follows, to turn Hideyori’s flank, and proceed with the march on Osaka.
Limitations - The Bridge must be taken intact – there is no bridging capability nearer than a week away. Reinforcements will not reach you for one day, and thus you must be able to hold the bridge, after taking it, against a possible major counter attack.
Forces - These should be kept secret. These comprise 14 units of mixed samurai and ashigaru.
You ordered forward a scouting party onto Tumbo Mountain last evening. They reported seeing the following troops – a mounted unit of samurai on the low, long hill opposite Tumbo mountain, at least one infantry unit in front of the bridge, and activity on and around the bridge.
Your troops have arrived under cover of darkness, and are ready to march on in column along the track entering the board on the south-west corner.
Bridge Preparation
Men appear to be preparing the bridge for demolition. Time is of the essence if your objective is to be achieved.

The Ford at Konaga - Tokugawa Hywil
The year is 1614, and you command a force of 12 units.
Situation - You are approaching the southern edge of the Forest of Shinzo. Your force has been sent ahead of the main army with orders to seize the ford and then hold the crossing of the River Koneso at Konaga. Reinforcements will not reach you until two days time. Your brother, Tokugawa Iestu, has a force attacking the bridge to your west.
Mission - Your mission is to seize the ford crossing at Konaga.
Forces - These should be kept secret. These comprise 12 units
You arrive on the southern edge of the table in line of march on a track. This track makes its way through the forest, but troops can move at half pace through all parts of the forest, and thus the track may not be the best route.
The Portuguese Friar - Your men have captured a Portuguese Friar, and under torture he has revealed that a force of at least your size is hidden within the woods, along the line of the track.
The Forest of Shinzo - The forest is open, and can be penetrated by both foot and cavalry at half pace. Normal visibility within the forest is 16 ins, but your scouts believe that hidden troops cannot be seen outside 3ins, provided they do not move or fire.

The Bridge at Konaga – Toyotomi Poraig
The year is 1614, and you command a force of 7 units.
Situation - You have been at Konaga since yesterday. Your force has been sent ahead of the main army with orders to prevent the Tokugawa forces seizing the bridge and crossing the River Koneso at Konaga. Reinforcements will not reach you until two days time. Holding the line of the river is vital in the defence of Osaka, and you are charged to do this by your liege lord and cousin, Toyotomi Hideyori.
Mission - Your mission is to hold the bridge crossing at Konigen, and thus prevent the Tokugawa seizing it, and using it as a crossing for their army.
Limitations - The Bridge must not fall into enemy hands. It would be preferable to keep it intact but it may be destroyed to achieve the mission. You may not deploy south of the low long hill, south of the bridge.
Forces - These should be kept secret. These comprise 7 units and 1 party of engineers with Portuguese advisors.
An advance party of troops arrived last evening, and these comprised one unit of samurai infantry which took up defensive positions to the south of the bridge, a party of engineers which immediately began to inspect the bridge for possible demolition, and a unit of samurai cavalry which rode forward as far as the crest of the low, long hill.
They saw a scouting party of Tokugawa across the valley on the major hill to the west (Tumbo Mountain) last evening. You expect the Tokugawa to arrive from this direction this morning.
Your other troops arrived under cover of darkness, and can be placed anywhere on the board north of the low, long hill. Any troops in dead ground behind a hill, or in woods, or in Konaga do not have to be placed on the Board, but are indicated to the Umpire on a map.
Bridge Preparation - Consult the Umpire for the mechanics of how to prepare the bridge for demolition. N.B. only you as the general figure can give the order to blow the bridge, and you have to be at the bridge to do so (or within 6 inches).

The Ford at Konaga – Toyotomi Shaymo
The year is 1614, and you command a force of 8 units.
Situation - You have been at Konaga since yesterday. Your force has been sent ahead of the main army with orders to prevent the Tokugawa forces seizing the ford and crossing the River Koneso at Konaga. Reinforcements will not reach you until two days time. Holding the line of the river is vital in the defence of Osaka, and you are charged to do this by your liege lord and cousin, Toyotomi Hideyori. Your brother, Toyotomi Poraig has a force defending the bridge to your west.
Mission - Your mission is to hold the ford crossing at Konaga, and thus prevent the Tokugawa seizing it, and using it as a crossing for their army.
Forces - These should be kept secret. These comprise 6 units of Japanese and 2 units of Portuguese troops, led by Fernando Pinto.
You may set up in cover, and hidden until you move, any of your eight units within the great forest of Shinzo, which lies south of the ford. A track makes its way through the forest, but troops can move at half pace though all parts of the forest, and thus the track may not be the route taken by the enemy. There is a large area of bog by the river, and between the ford and the bridge. You know that this is in fact an area of quick-sand and totally impenetrable.
The Portuguese gambit - Your spies have told you that the Tokugawa will come from the south, and probably along the line of the track. Pinto has offered to take his men by ship and land behind the enemy. They can then arrive on the southern edge of the map in 2x D6 moves. You do not have to accept his offer, and can deploy them hidden with your troops if you wish.
The Forest of Shinzo - The forest is open, and can be penetrated by both foot and cavalry at half pace. Normal visibility within the forest is 16 ins, but your men have prepared hides cunningly and cannot be seen outside 3ins, provided they do not move or fire.

Friday, December 2, 2011

Post WWI - Silesia 1920

This weeks game at the SESWC was a 28mm post WWI game set in Silesia in 1920. Colin Jack and I have built up a collection of late WWI German figures which can be used for WWI or for later actions involving Freikorps units. Colin came up with a fictional scenario of a Freikorps attack on a Polish hell village in Upper Silisia in 1920.


Russ-Balt gun truck - core of the Polish defence
Upper Silesia was a mixed ethnic area whose fate after WWI was to be decided by a plebiscite to see whether it should become part of the new Poland or remain part of Germany. In the period running up to the plebiscite and afterwards there was considerable ethnic violence from both sides attempting to doctor the result. Following the plebiscite which voted in favour of Germany the region was split between Poland and Germany with half the population and the main industrial centres being granted to Poland.

Freikorps move fordward on the village
The game was fought along a 8ft by 6ft table. Colin and I deployed 5 battalions of heavily armed of Freikorps facing the Poles with 3 battalions of lightly armed irregulars but with the support of a Russo-Balt gun truck. The German Freikorps commanded by Colin and I attacked across the width of the table to take the village held by the Polish irregulars under Bart Zynda. My Germans adanced on foot and struggled forward under MG fire and very accurate shelling from the Russo-Balt. Colin's 2 battalions arrived by bus and drive down the main rode before debussing and attacking the village across a field and a cemetery. Eventually my MGs knocked out the Russo-Balt and we both made headway against the Polish troops in the village. My minenwerfer which had been manhandled almost to the village fired only 1 shot but destroyed the Polish Mg.

Colin's Freikorps debuss - literally!!!
We decided that given the imbalance in the equipment on each side that the game was actually a Polish victory given the time it had taken the Freikorps to get to just the edge of the village.  The German figures are by Renegade and the Polish irregulars from many sources. The German stormtroopers are some of the best figures that Renegade mak. We used the Contemptible Little Armies rules for the game.  The basic terrain was faux fur and the bulk of the buildings are by PMC Games.

Kreikorps take shelter in a copse before attack on the village
The slow moving but highly accurate minenwerfer - 1 shot hero!

Saturday, November 26, 2011

This week - Review of LAOK and some new troops

I did not get to any games this week so I have added a new page with a review of  The Last Argument of Kings from Warlord games.  This is the first official supplement to Black Powder.

In addition I have completed basing up more troops that I had painted by Reinforcements By Post in Bangladesh.  There are some reinforcements for the upcoming 1812 Russian Campaign anniversary and the first elements of a long term project for a Prussian Army to help out in the 1813-14 anniversaries.  Bases are MDF from Warbases, Silflor tufts from Mutineer Miniatures, flags by GMB and Maverick.  Here are some photos:


Frontrank Polish Lancers of the Guard

Steve Barber Dismounted Russian Pskov Dragoons
  
Steve Barber Cossack horse artillery crew

Calpe Prussian 5th Dragoons Brandenburg

 
Calpe Prussian 2nd Dragoons West Prussia

 
Calpe Prussian Foot Artillery


Friday, November 18, 2011

Belgium August 1914

This weeks game at the SESWC was a 28mm WWI game. Colin Jack and I have built up a collection of early war figures for Germany, Britain, France and Belgium so we decided to try out the Contemptible Little Armies rules for that period. The figures are by Renegade except for the pluckly Belgians who are by Brigade.  Colin came up with a fictional scenario of a Franco-Belgian counter-attack in August 1914.

German infantry at edge of village.  MG in building on left.
The Setup
The game was fought across a 8ft by 6ft table. The Belgians commanded by Colin attacked on the left flank to take 2 low hills held by the Germans under Bart Zynda whilst I with the French attacked a village held by Germans commanded by Hugh Wilson.


Belgian grenadiers take the walled field
How the game played
On the left wing 4 units of Belgian infantry made good progress against the Germans who decided to advance to meet them head-on with their 2 battalions. The arival of a Minerva armoured car proved decisive and the Belgians pushed the initial Germans back, taking the 2 low hills and wiping out them and their supporting Mg and artillery. They then held their ground against a counterattack by 2 fresh German battalions.

French close on the village - just seconds from disaster
On the right I was not so successful. My French who were rated as Ferocious in attack suffered heavy casualties and 2 battalions were destroyed by mg and rifle fire trying to reach the village. One of the battalions of 18 figures was wiped out in single turn without ever causing any casualties. The situation was saved by the charges of the French Chasseurs D'Afrique and the Belgian Guides who broke a German battalion. Two fresh French battalions then advanced to renew the attack on the village. An attack by german cavalry was held of but with heavy losses. We concluded that the game was an allied victory....but at heavy cost.

Chasseurs D'Afrique charge home...sabre vs picklehaube
The Rules
They work okay if you like removing massive numbers of casualties. However you can always recycle the troops back onto the table as we did in this game..

Sunday, November 13, 2011

TARGE 2011

This Saturday I went to the Kirriemuir Wargames Club's show Targe 2011.

Colin Jack, Hugh Wilson and I put together a 28mm display of the action by the Canadian forces at St Lambert Sur Dives part of the Battle of the Falaise Pocket. The inspiration for this game came from Colin buying a Corgi M3 halftrack which turned out to be Canadian. Further research into the unit it was from led Colin to produce the display. Colin provided the scenario and all the troops whilst Hugh and I supplied some of the missing terrain items. We actually played out the display using the Rules of Engagement - with late arriving support it proved to be a Canadian vistory.

Canadians in St Lambert
Here is a link to my flickr photoset from the show.
http://www.flickr.com/photos/bill26048/sets/72157628119552296/

My highlights from the show were the Border Reivers Dublin game set in the Irish Civil War 1922, the League of Augsburgs demo of the latter part of the Battle of the Boyne, The Iron Brigades ECW game and the Buchan Wargames Group very snowy game of Crossing the Berezina 1812.

Dublin 1922 - Free State troopers in action

The show had certainly grown this year - with a further room being used for displays.   I got some bargains at the Bring and Buy and stocked up on some necessities for the long winter months as Targe is my last show of the year.

My thanks to Dale Smith for all the effort he and his fellow club members put into it's organisation..

LOA - Williamite troops including the Dutch Guards
Link to the Targe website
http://www.kirriemuirwargames.co.uk/Targe.shtml

Saturday, November 5, 2011

Refight of Brandywine 11 September 1777

This Saturday we refought Brandywine 1777.

Patriot militia engage the Hessians

I have added a specific page with a full description of the scenario, ob, rules used etc to the list of Pages.

My thanks to Hugh Wilson for providing the venue and building the vast bulk of the terrain we used.

My special thanks to Suzanne Wilson for providing the game specific etnic cuisine.  It was really great - boston bean stew, cornbread, sour dough bread and pumpkin pie.  Very tasy and much appreciated by the mob of 9 hungry wargamers.

Here also is the link to FlickR photoset with descriptions of the photos.

http://www.flickr.com/photos/bill26048/sets/72157628061558768/


Hessian Grenadiers break the Massachusetts who carry away George Washington...
Bill

Friday, October 28, 2011

Continuation War - Karelia 1941 near Viipuri

This weeks game that I played at the SESWC on Thursday evening was a 20mm World War II action using the Rapidfire rules.  Colin Jack and I provided the troops. I worked out a fictional scenario set in the Continuation War so that Colin could use his Finnish troops. Here is the player briefing and OB.
Soviet command watches the  impressive T28s roll forward

Northern column with the less impressive T26s
Background
On 27 August as part of their offensive in Karelia Finish troops had cut the road and rail links between the city of Viipuri and Leningrad trapping 3 Soviet divisions in Viipuri. The Finish high command did not want to undertake a major struggle for Viipuri and diverted troops to move south towards the 1939 frontier. Sensing that the ring around Viipuri had been weakened on 29 August Leningrad Front launched a major counterattack to free the units units trapped in Viipuri.

Finish Objective is to prevent Soviet units exiting the table to the north.

Soviet Objective is to break thru the Finish defences and exit motorised units to Viipuri.

Finish OB
2 infantry battalions (veteran) on table deployed each:
HQ: 5 figures incl ATR
Coy: 8 figures
Coy: 8 figures
Coy: 8 figures
Supp: Mg, Mtr & 6 crew
AT coy: ATG & 3 crew

Tank battalion (regular) in reserve comprising
Coy: T28, T26, 6 Tonner
Coy: 3 T26

Finns have complete air superiority

Map of terrain and Soviet deployment - table was 8ft by 6ft
SOVIET OB
314th Motor Rifle Regt
3 Lorried Btns (regular) ea of:
HQ: 5 figures
Coy: 8 figures
Coy: 8 figures
Coy: 8 figures
Supp: Mg, Mtr & 6 crew

Plus regt support
Art coy: 76mm inf gun, 3 crew & tow
AT coy: 45mm at gun, 3 crew & tow
AA Coy: Qd AAMG truck

56th Provisional Tank Regt (poor)
Btn: 2 T28, T34
Btn: 3 T26B, BA10
Btn: 3 T37/38

Baltic Red Banner air fleet has promised to support this effort.

Notes
In the swampy terrain of Karelia all the vehicles are road bound except the Soviet’s T34 and T37/T38 amphibians. In addition the T37/38s could cross the swampy terrain as bad going. The T34 had to dice for breakdown each time it moved - on a 1 it would break down and be abandoned.

How the game played
In the game Colin Jack and Bart Zynda commanded the defending Finns whilst Hugh Wilson and Dougie Trail commanded the Soviet attackers. I umpired and acted as war photographer.

Main Soviet effort - first T28 suffers light damage 

The Soviets advanced with their T28/T34 Btn and an infantry battalion down the southern route with the T26 coy on the northern route each supported by a dismounted infantry battalion. The T37/T38s advanced in the swampy terrain on the far southern flank.

Unexpected - amphibious tanks take to the swamps


They Soviets came under fire from the hidden Finnish AT guns engaging them as they slowly moved forward. The Finns then committed their armour reserve - all the tanks in the Finnish Army - down both routes. Thus the game developed into a tank duel.

The Finnish T26 coy was quickly reduced to 1 runner under the fire of the T28s and T34. The T28s helped their supporting infantry unit occupy a small hamlet.

On the other flank the Finns bested the soviet T26s knocking out 3 of them but the unit held. In addition the Soviet infantry then came under strafing attack from a Finnish Brewster Buffalo. It caused casualties on the Soviet infantry but eventually it was driven of by the lorry mounted quad AA mg. The Red Banner Baltic Fleet airforce did not put in an appearance as I had left them at home.
Finnish airpower - below T26s burn on the highway

Captured T28 explodes


The T34 was moving to support the T26s when its gearbox failed and it had to be abandoned.

However the T28s knocked out the captured T28 and it’s loss caused that Finnish tank company to flee. With the T28s and their infantry doing well and the reserve motor battalion moving up in support it looked like a Soviet victory.

An enjoyable game.

Link to flickr photoset
http://www.flickr.com/photos/bill26048/sets/72157627999638362/

Friday, October 7, 2011

Busy week - Gitschin 1866, AWI and SKELP 2011...

This week has been a busy time for games.


Patriot Continentals open fire...
 On Tuesday I played an 28mm Black Powder AWI game at home. The game was basically a reduced version of Camden played to introduce the rules to Dave Paterson and Mark Taylor. The British commanded by Dave had a regular brigade, loyalist brigade and a cavalry brigade of 2 small units of British legion cavalry. The Patriots commanded by Mark had a continental brigade, a militia brigade and small mixed brigade of riflemen and cavalry.
British regulars brek their opponents thru volley fire...
The Patriots took the offensive with their continentals and the mixed brigade but were worsted in a long struggle by the regulars and the legion cavalry. All 3 units of the continentals broke. However the militia defending a fence line got the better of the laylists breaking 1 unit and forcing the other to retire. At the end of the game only 2 of the surviving patriot units were not shaken. It was a rare British victory. As it was a starter game for Dave and mark we played the rules using the standard sequence of play not the revised one from & Blenheim I have used in recent games.

Austrian centre...
On Thursday at Hugh Wilson's I took part in a test game of Gerry Henry's latest large scale 1866 game. It was a refight of the Seven Weeks War Battle of Gitschin (or Jicin) with 10mm fgures played over a 10ft by 5 ft table. Gerry had once again produced very detailed contoured terrain. All the trees were individually inserted into the terrain so it took a lot of effort from Gerry to set up in advance. We were again testing the 1866 version of the Piquet rules. With the card driven initiative and order system you can get very variable levels of activity for each side. The Austrians got the run of the cards at the beginning and pounded the Prussians (mainly my command) with very effective fire. Later on we got the run of the cards and Colin Jack commanding the Prussian flank march made good use of the Schnellfeuer card! An enjoyable game and it looked great. My thanks to Gerry.

Prussian flank march unfolds...

Here is the link to Gitschin photos on my FlickR site

http://www.flickr.com/photos/bill26048/sets/72157627716290169/

At last my command reaches the ridge..


Update - Photos from SKELP 2011 held this weekend in Forfar staged by Angus Wargames Club. Our Canadian Arctic 1944 game won best PP game and Best game with a Naval combined Ops theme!

Our Arctic PP game - crashed Nazi disk at this end...

Poster says it all......

RAF Leuchars Great Escape PP Game - with music....

Independent Wargamers Chinese Siege - great buildings..

Highest score of Penguins inspected by leader!!!!!

My last post for 2 weeks - my own great escape on vacation....

Friday, September 30, 2011

Canadian Arctic 1944......

This week I did not go to the SESWC as Colin Jack was again stuck at home so Hugh Wilson and I visited Colin for a game and a meal.
Colin put together a test of his PP game for the upcoming Skelp show in Forfar next weekend.

Heroic Mountie with his faithful dog or is it a wolf...
 Link to Skelp info is here
http://anguswargamesclub.com/index.php?p=1_9_Skelp-2011

The game is set in the Canadian Arctic in 1944 and involves 2 teams of German saboteurs crossing the arctic wates to blow up a crash landed experimental German flying saucer! On the way they have to contend with the local inuit people, canadian hunters, special events  and a single mountie with a dog. Why would you ever need more than 1 mountie!

We played the game thru twice and simplified and revised the already simple rules.  Some photos from the test are below - I will add in more from Skelp and will publish the rules then.

German submariners land from Das Boot...
Canadian trappers looking for a moose...